Home › Can I get a resin floor?
Getting a new floor can be a stressful, confusing process. What type of floor should I get? What design should I choose? Perhaps the biggest question of all - one that stops many people from getting starting in the first place - is what to do with the current floor. Do I need to get rid of it, or can I go over the top? Does it matter if it’s dirty or damaged?
By going through each type of flooring surface, this page aims to answer those questions and help you make some of the key decisions involved in switching to a resin floor.
A clean, sound concrete slab is the best surface for resin flooring and can easily be prepared by a number of machines that remove loose contamination and create a fine texture for the resin to bond to - a floor grinder being the most common example. Unfortunately not all concrete is in such perfect condition and extra steps need to be taken in addition to this mechanical preparation to address certain issues.
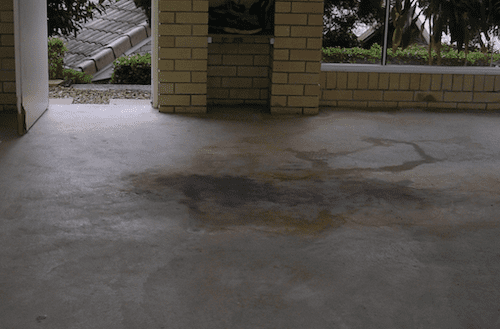
If your concrete is contaminated with oil, grease or detergent, it will need to be degreased as the very first step. Uncovered concrete in
garages, kitchens and laundries are common areas that require degreasing, but if in doubt you can test your concrete by dripping a small
amount of water onto the surface. If it beads or pulls back on itself rather than soak in then you should look to degrease. Degreasing is a
simple, inexpensive process that can be done by anybody 24 hours prior to work beginning, however it needs to be done thoroughly and
repeatedly until the water no longer beads.
Previous paints or sealers on your floor can be over-coated if they are in sound condition and strongly bound to the concrete. In most cases, however, a contractor will remove them with a grinder during regular surface preparation just to be safe.
One exception to this rule is the polished concrete floor. The ultra-hard nature of these surfaces means they can pose some problems with adhesion of resin floors and should be tested beforehand. Most contractors will recommend performing a small adhesion test in an inconspicuous area to make sure there are no problems.
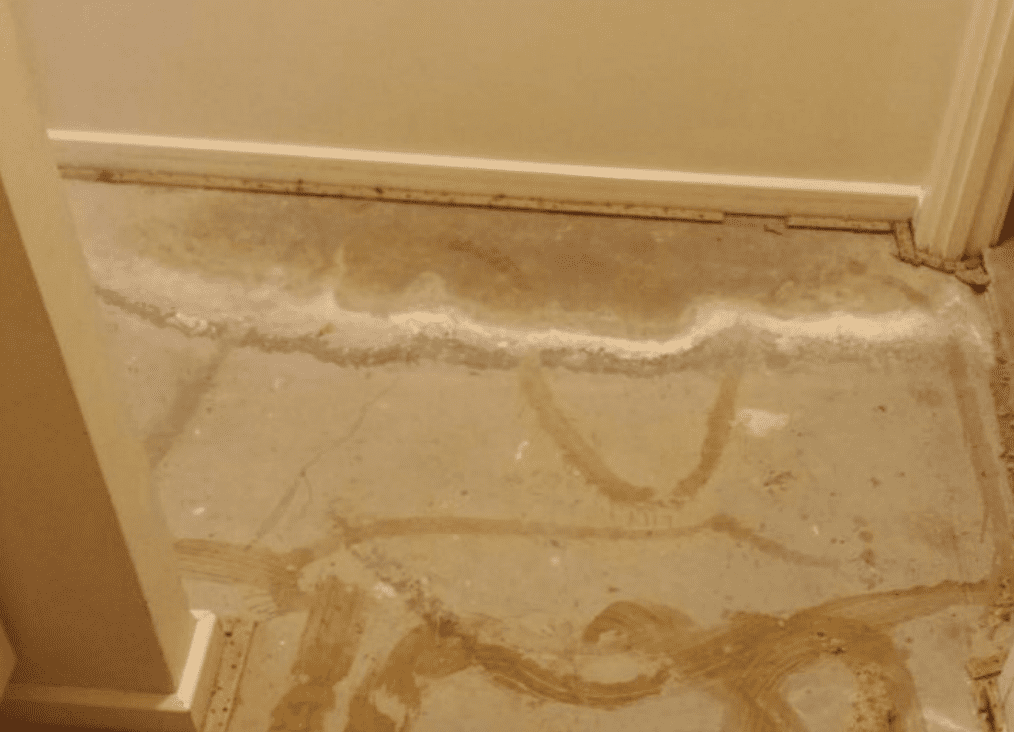
Excessive movement of water or water vapour through concrete creates a powerful force called hydrostatic pressure that can be destructive to all types of flooring. Typically this pressure is caused by a moisture source close to the bottom of the slab, which, in the absence of proper moisture barriers, sees water rise through pores in the concrete and damage the floor on top.
While moisture issues can be fixed with the installation of suitable moisture barriers, they can be tricky and require input from waterproofing specialists. Luckily there are a few things both you and your flooring contractor can look out for to see if this might be the case.
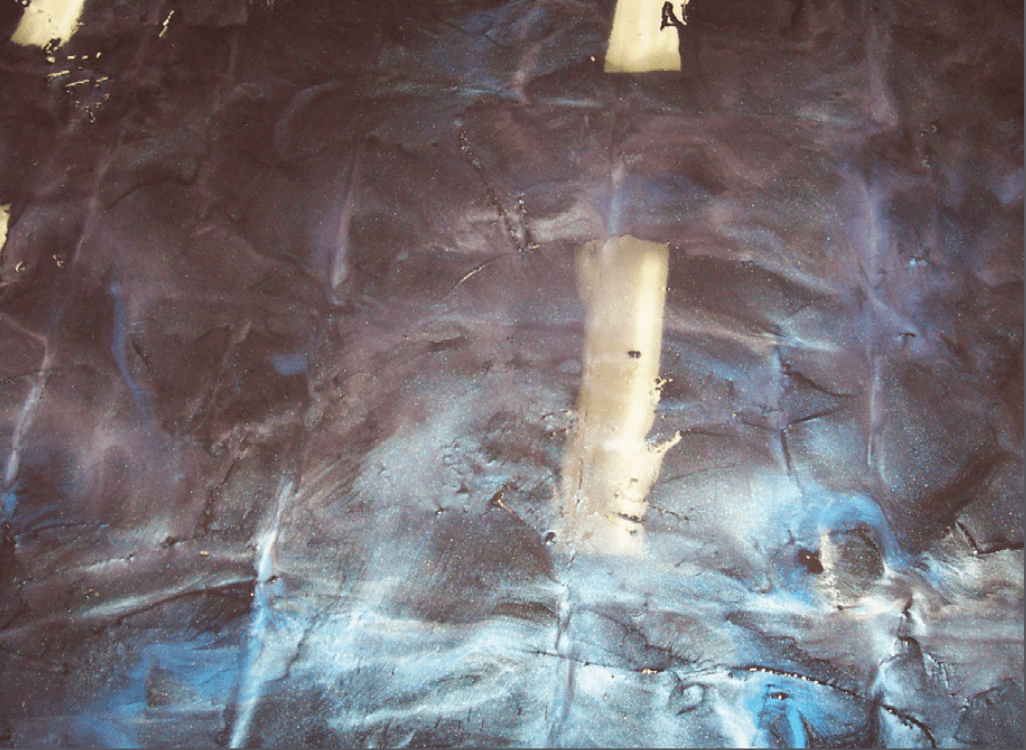
The first thing you can do is keep an eye out for efflorescence, which is the appearance of whitish marks resulting from moisture depositing silt-like substances as it dries. If you can’t see anything that obvious, you can tape a 60cm x 60cm plastic sheet to the concrete with duct tape and leave it for 24 hours. If droplets appear on the underside, or if the concrete appears darker in this area, your slab could have a problem. Beyond that, your contractor may also do another simple test that involves grinding a small patch. If the patch quickly darkens, hydrostatic forces may be at play and will need to be addressed.
The pile of dirt or dust in the corner of the garage isn’t a big deal when it comes to resin flooring because it will simply be collected during the grinding process. Occasionally, however, a large amount of dust can be a symptom of a weak or porous slab and that may mean extra measures are needed to ensure a good result.
To test the porosity of your concrete, drip a small amount of water onto the surface after grinding has begun and watch how quickly it’s absorbed. If it instantly disappears then the chances are the resin will do the same. In these situations a contractor may recommend a thin coat of epoxy concrete sealer is applied first to prevent the other coats from soaking in too much and affecting the overall finish. While this extra step requires more resin and adds another day to installation, it’s worth it if you want the best result on a porous slab.
Applying any style of flooring onto concrete that isn’t within acceptable tolerances for flatness, smoothness and projections can lead to substandard results. You can get a good idea of what your slab is doing in this regard by lying a straight edge tool down and seeing if there are any gaps underneath. Grinding generally takes care of small projections, however flatness and smoothness need to be carefully addressed because many decorative coats will flow freely and that can create havoc in all sorts of ways - high points can look patchy, low points can look flooded/messy, and, to top it off, the gloss has a knack of showing how uneven the floor actually is (which is often mistaken for contractor or product error).
If your concrete is “up and down”, it will need to be levelled with a levelling compound beforehand, which will add a certain amount of time and cost to the epoxy floor depending on how bad the slab is.
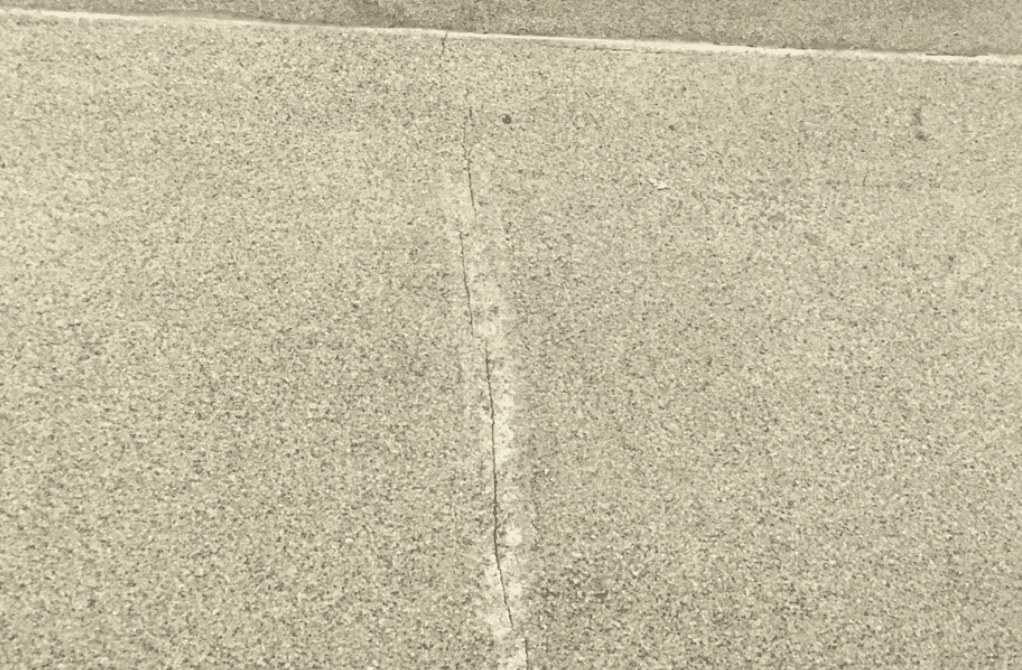
Every concrete slab has cracks and while they may sound like a big problem, most of the time they can be fully concealed by the resin flooring system applied.
How can you tell which cracks fall into this category?
Basically, there are two types that occur in concrete: static and dynamic. Static cracks occur for a variety of reasons, however most are simply the result of the concrete shrinking as it dries. They are typically narrow, shallow cracks that don’t grow and probably aren’t even noticed until you have a closer look. Because of their size and static nature, these cracks can be patched by a flooring contractor before applying the resin floor and the odds are you’ll never see them again.
Dynamic cracks, on the other hand, are typically much larger and may even run from one edge of a slab to the other, with the crack edge itself often frail and crumbling. Because these cracks are the result of movement in the slab, they can continue to grow and that makes them a more difficult proposition.
The common approach with these types of cracks is to “clean out” the existing crack and fill it with a flexible material after the resin floor has been applied. These repairs often end up looking like just another joint (see below), which might not be ideal from a purely aesthetic point of view, however it will always look better than an ugly crack and it will give your floor a much better chance of lasting longer.
The most important thing to keep in mind when it comes to cracks, especially the dynamic kind, is there are no guarantees. Treating cracks will be effective in hiding them initially, however if further movement occurs in your concrete then they may show through again down the track.
Just like cracks, there are two common types of joints you can come across in concrete: control joints and expansion joints.
Control joints are the smaller of the two - up to 8mm wide and typically less than 30mm deep - and are cut with a saw in 6m x 6m grids after the slab has been laid. The idea of a control joint is, as the name suggests, to control where cracks form on a slab by creating a thinner, weaker channel for them to follow. While these joints are effective, the reality is that cracks can and do show up in more visible places from time to time.
When it comes to resin flooring and control joints, floor owners can choose whether or not they want to cover them. A flooring contractor can fill the cuts before applying a resin floor over the top and many owners go down this path to get the beautiful seamless look. Although this option holds obvious appeal in that sense, you should keep in mind that if the slab does move and a crack forms in the joint, it’s likely to reflect through in the floor on top as well. While the joint can be re-cut and filled with flexible material if this happens, some people don’t want to face the repair costs and will get the sealant work done from the outset.
Expansion joints are larger than control joints and are created during the laying of the slab to enable sections to move independent of each other. Unlike control joints, it is not advised to cover expansion joints because there is usually too much movement in these areas for a floor to handle. With this in mind, a contractor will apply the floor up to and into the joint itself, before finishing off with a flexible sealant as mentioned a few times here already.
As a final point on joints and cracks, it’s worth highlighting that the sealants used to treat them are somewhat limited in colour choices and, therefore, it’s not always possible to find an identical colour match.
For floor owners with a new concrete slab, the only thing that needs to be considered from a resin floor point of view is giving it enough time to fully harden. The old rule of thumb is to let new slabs sit for at least 28 days so that the moisture and silt-like substances mentioned before have a chance to come out and can be removed prior to application. Applying a resin floor too soon can result in a number of problems - from film defects that ruin the finish, to adhesion issues that lead to premature floor failure.
While plain concrete is the preferred surface for resin flooring, many people will already have another floor covering in place. What happens in these instances? Can epoxy flooring stick to tiles, or will they need to be removed so we can get back to concrete once again? What else do you need to weigh up? We’ll start with tiles because it’s a very popular floor covering and many owners are drawn to the idea of a smooth, hard, easy-to-clean surface without the grout lines. As you’ll read below, it is definitely possible to go over tiles, however there are a couple of things that come into play when deciding if you should or not.
When going over the top of a tiled floor, the main concern is adhesion - with the resin floor onto the tile and tile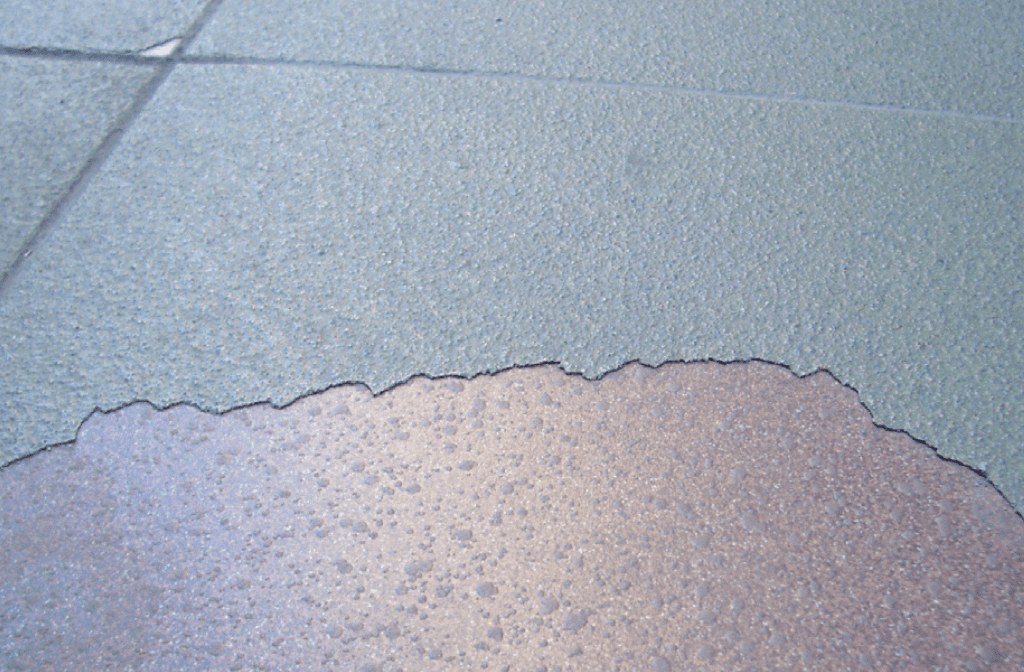 onto concrete.
Many floor tiles have a glossy finish from the glazing process or from protective sealers and this can make them tricky to bond to. Contractors will look to remove this gloss through grinding and while this is effective in most cases and with most tiles, vitrified tiles are an exception because they’re impervious all the way through and it’s hard work creating the profile a resin needs to hold onto.
In addition to surface of the tile itself, close attention should be paid to the condition of the grout lines. Being a porous material, grout has a nasty habit of soaking up all sorts of grease and grime that can play havoc with adhesion. If your tiled floor is in a commercial kitchen or anywhere exposed to heavy oil contamination, you may be better off digging up the grout lines or removing everything just to be safe.
Finally, the issue of adhesion must also be considered with respect to the floor tile and concrete. Tiles can become “drummy” over time and that represents a weak point in the flooring. If more than a few tiles are found to be loose - or they start to shatter, crack or pop while grinding - it’s probably better to remove them all so the concrete underneath can be used instead. Even if they all feel fine and you end up going over them, it’s always difficult to predict what they might do in the future.
If it’s determined that adhesion won’t be an issue with your tiles, the next box that needs to be ticked before you go over them is to make sure they’re flat.
While a flat substrate can be achieved mechanically through grinding, it’s generally quicker and easier for contractors to apply a levelling compound. There are a few things you should know about this step.
Firstly, up to 5mm may be needed to fully cover grout lines, which can add $30-35/m2 to the cost and potentially cause headaches elsewhere with regards to heights around fixtures etc.
Secondly, not all levelling compounds used for this task are the same. While they all may produce a flat surface, different products can interfere with a resin flooring system in different ways.
For instance, floor levellers heavily diluted with water tend to form porous surfaces that could lead to bubbles and variations in gloss, while others can expand and contract at different rates to the tiled floor, leading to grout lines becoming visible once again (so-called “ghosting”). If your contractor recommends levelling, it may be worthwhile asking what product they use and whether or not these issues could be a problem.
Lastly, ghosting in the form described above tends to happen gradually, however grout lines can also show through immediately in some cases if the floor hasn’t been made perfectly level. Contractors are usually pretty good at getting these products flat, however the pigments used in metallic resin floors are excellent at finding any low spots and even if you can’t feel the grout lines you can still end up with a visible grid.
For the reasons already mentioned, often a tiled floor will simply offer no alternative other than to remove what’s there and get back to clean, sound concrete. The actual lifting of the floor tiles is done relatively easily in most cases; it’s the combination of glue and leveller underneath that can be pretty stubborn and time consuming to remove.
(As a quick side note, levellers are a regular feature underneath tiled floors because they need a flat bed to make sure the tiles themselves are level and avoid raised edges etc.)
A regular thing that can be overlooked with removal is the damage done to the concrete during this process. If the floor isn’t going to be covered with a leveller after tile removal (read below), extensive patching to could be required repair divots and chips before the resin floor goes down. While these issues are probably more for the contractor to worry about, it helps if you know what to expect and why plans can change from time to time during installation.
Overall, standard tile removal might be $30/m2 depending on the size and shape of your floor (including disposal of waste etc). Once removed, you then have a big decision to make with regards to your floor and, in particular, the height you want it to be.
What many owners don’t realise when they get tiles is the combination of leveller underneath and thickness of the actual tile itself can easily add over 15mm of height to floor. If the new floor doesn’t take up the same space then you are left with large, unsightly gaps underneath skirting boards and other trimmings. In this case, a resin floor will only add around 1mm to the height of your slab and obviously won’t fill the space left by tiles on its own. The decision you have to make is whether or not to re-build the floor with leveller first and get back to the original height, or, stick with the normal height of your slab and adjust the trimmings later.
Many floor owners understandably don’t like the idea of fiddling around with the heights of trimmings, however installing a leveller at such thicknesses can add significantly to the overall epoxy flooring cost. If the 5mm or so required to flatten grout lines can add $30-35/m2, you can easily get a ballpark figure for what re-building a floor to 15mm and beyond will cost.
As other popular types of hard surface flooring, wood and laminate are also already down in many resin floor enquiries and, as with tiles, floor owners generally want to explore the idea of going over first them rather than talk removal.
While the same issues of adhesion and flatness can be addressed in much the same way as tiles, the biggest difference is the added concern of movement that applying onto wood and laminate introduces. Although they have more “give” than tiles, resin floors are essentially rigid films that require a rigid surface underneath. If there’s too much flexing or movement between the planks or sheets, the chances are you’ll start to see cracks form in the resin floor on top.
If removal isn’t an option for whatever reason and you simply must go over the top, the safest approach is to reinforce the floor first to minimise the differential movement. A common technique used for this task is to fix 15mm fibre-cement sheeting diagonally across the floor in preparation for the resin floor; however, this obviously takes a bit of work, raises your floor height by another 15mm, and can see the total installation cost climb above the $150/m2 mark.
With all that in mind, the vast majority of resin floor projects involving wood and laminate eventually go down the path of removal and use of the concrete slab beneath. At this point, the same decisions mentioned in the tile removal section on the previous page come into play and similar approximate figures apply to heights, costs etc.
When it comes to existing vinyl floors, it’s a little more cut and dried as far options go because going over the top with a resin floor isn’t usually the way to go. There are two main reasons for this: firstly, preparing a vinyl surface so the resin floor can stick isn’t easy, and secondly, uncertainty around the soundness of the layers beneath a vinyl floor make it a risky practice.
Just like tiles need a perfectly flat surface to avoid raised edges, vinyl also requires a nice, even platform otherwise any dips and hollows may show through in the finished product. As a result, you’ll normally find a similar combination of levellers and glue underneath and find yourself faced with the same set of decisions to make with regards to floor heights, costs etc.
You can read a separate article on where epoxy flooring is better suited than vinyl flooring on our commercial flooring projects page.
The soft, fluffy nature of carpet is obviously not suitable for splashing on a resin floor and carpet owners have no choice but to rip it up and use the concrete underneath. Fortunately this is probably the easiest type of flooring to remove because most carpeted floors only consist of the pile on top and a spongy underlayment underneath.
There’s rarely any need for the levellers or glues we’ve already covered and no large height differences to contend with either. Apart from physically rolling it up and carrying it out, the only extra step that may need to be taken is some localised patching of the concrete where the tack strips used to hold carpet tightly in place were anchored.
While the patching is usually only a small task, it does have ramifications for your choice of resin floors. Specifically, if you were thinking of getting a clear finish for a polished concrete or “warehouse” look, the patches will be visible and that may not be what you had in mind. The same warning can actually be applied to tiles as well because removal can leave behind patches and even staining that will show through in a clear finish.
This document was put together to help prepare you for the types of decisions that need to be made when it comes to replacing your current floor with a resin floor. It is not a complete guide on the topic, however, and is best used in combination with the opinions of professional flooring contractors who can inspect your floor first hand.
Some other issues that have a bearing on the installation of resin floors and should be discussed with your flooring contractor, where applicable, are:
For more information and handy tips on resin flooring installations, download a free copy of our Resin Flooring Guide
below

Get our 20-page resin flooring guide for specifiers and floor owners here
_800x271a.png)