Home › Solutions › Residential › Resin Guard™ › Resin Guard™ Specification Guide
The following guide contains instructions for specifying the protective rollcoat epoxy flooring system
manufactured by Real World Epoxies - Resin Guard™
This specification is applicable to the Resin Guard™ Protective Rollcoat Flooring System manufactured and supplied by Real World Epoxies (RWE) Pty Ltd.
This work section should be read in conjunction with installation and maintenance guides for the system.
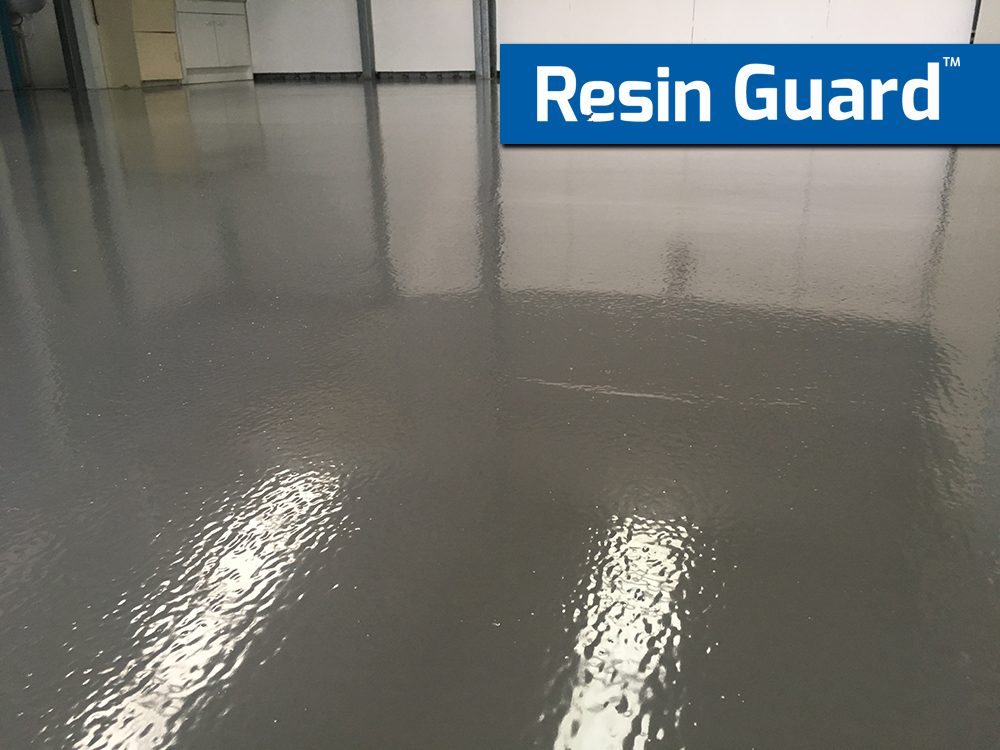
Resin Guard™ is a smooth, solid-colour floor finish specially designed to seal and protect warehouses, workshops and other commercial areas.
Available in all Australian Standard colours, the completely seamless resin flooring system can be applied in all conditions, and is resistant to wear, chemicals and impact.
Most importantly, Resin Guard™ has no strong smell and contains no solvents or flammables, so it can be installed safely without risk or disruption to your workers or business.
The design aim is to confirm the Resin Guard™ flooring system - standard or with the available options - can satisfy the client’s functional and decorative intention, as well as suit the expected service and maintenance demands of the flooring area.
The products used should be Real World Epoxies products, supplied in their original containers with product code, batch code and other markings clearly visible.
Must be a licensed resin flooring installer (where applicable), with proven experience in the application of thin-film rollcoat flooring systems.
All parties must conduct pre-contract meeting to confirm project requirements, substrate conditions, manufacturer’s specification and warranty requirements.
A labelled sample of the system on plywood, MDF or similar surface must be submitted before project commencement, clearly showing the colour and surface finish. Minimum size allowed is A4.
The current editions of the manufacturer’s product literature, including relevant testing and certification, technical data sheets (TDS), safety data sheets (SDS), and application/installation instructions.
Manufacturer’s product warranty/guarantee should be submitted, as well as the workmanship warranty offered by the installer.
Real World Epoxies Pty. Ltd.
19/10 Miltiadis St
Acacia Ridge
QLD 4110
PH: 1300 EPOXIES

| First Coat - Optional Primer: |
Ezypoxy Clear - Clear, 100% Solids General Purpose Epoxy |
| Application Method: | Brush, Roller |
| Spread Rate: | 6.67m2 per litre |
| Wet Film Thickness (WFT): | 150 microns |
| Dry Film Thickness (DFT): | 150 microns |
| Finish: | Gloss |
| Second Coat - Basecoat: |
Ezypoxy Rollcoat - Tintable, 100% Solids Epoxy Rollcoat |
| Application Method: | Brush, Roller |
| Spread Rate: | 5m2 per litre |
| Wet Film Thickness (WFT): | 200 microns |
| Dry Film Thickness (DFT): | 200 microns |
| Finish: | Semi-gloss |
| Third Coat - Topcoat: |
Ezypoxy Rollcoat - Tintable, 100% Solids Epoxy Rollcoat |
| Application Method: | Brush, Roller |
| Spread Rate: | 5m2 per litre |
| Wet Film Thickness (WFT): | 200 microns |
| Dry Film Thickness (DFT): | 200 microns |
| Finish: | Semi-gloss |
Notes:
Prior to commencement of work, arrangements should be made to conduct an examination of the floor area to be coated. Notes concerning the prevailing conditions should be taken along with photos of the site, and issues addressed during pre-contract meeting (Section 1.2.3). Do not proceed with the work until all conditions have been met to the satisfaction of all parties.
Remove strips, transitions, skirting boards, door stops, drain covers and other fixtures where possible, and re-fix in position upon completion of the installation.
New concrete surfaces should be allowed to cure for a minimum of 28 days.
Contaminated concrete surfaces should be degreased with a suitable detergent prior to surface preparation.
Small static cracks, chips, divots and other minor imperfections should be patched with Ezypoxy Clear with RWE Ezypatch filler.
Checks and measures should be taken to ensure the subfloor should not deviate more than the following distances under a straight edge tool (as per Australian Standard AS 1884-2012):
Diamond grind or shot blast to obtain a CSP 2-3.
Properly prepared surfaces should be structurally sound and free of contamination, laitance and any loose material.
Ensure surface is clean, dry and dust-free again if there’s a delay between preparation and application.
If the concrete is found to be weak, powdery or porous during preparation, a primer coat of Ezypoxy Clear should be applied first.
Maximum delay between coats is 36 hours @ 25oC. Should this time be exceeded the previous coat must be lightly abraded with 80-120 grit paper, vacuumed and wiped with methylated spirits or other suitable solvent.
Old, existing films can be over-coated providing they’re in good condition and there are no adhesion issues. If in doubt, a tensile adhesion test should be conducted.
Control joints can be in-filled prior to system installation if preferred by the client, e.g. aiming for a seamless finish. It should be made clear, however, rigid materials such as this resin flooring system are at greater risk of developing cracks in these areas.
Provide movement joints as follows:
Where possible, carry the seamless finish material over the edges of the control joint in the substrate. Provide a sealant joint as follows:
Diamond grind or shot blast to obtain a CSP 2-3.
Properly prepared surfaces should be structurally sound and free of contamination, laitance and any loose material.
Ensure surface is clean, dry and dust-free again if there’s a delay between preparation and application.
If required, coving can be installed prior to system installation using Ezypoxy Clear with RWE Cove Mix and a coving tool of suitable
radius.
Apply selected design in accordance with specification in Materials (Section 2.2) and manufacturer’s installation guide.
The standard system can be modified to achieve the following:
Light traffic can resume 24 hours after the final coat has been applied. Full service can be restored after 7 days.
A handover meeting should be conducted within the first 24 hours to identify areas that may need repair or replacement. This should involve the review and official submission of daily records collected by the installer. Once all parties are satisfied with the work done, signatures should be given to indicate official acceptance of the project.
The manufacturer’s published floor maintenance instructions should be submitted to the client if not already done so.

Get our 20-page resin flooring guide for specifiers and floor owners here
_800x270a.png)